
Onboarding Completion
Learn about the AI Assistant here,
AI Assistant
You can learn how to use the AI Assistant in this tutorial.
How To Use Your AI Assistant
Objective
This is a step-by-step guide to configure AI prompts for summarizing company profiles, generating subject lines, drafting introductions and Direct message. These prompts can streamline lead generation and enhance communication with prospects.
Step 1: Access AI Prompt Settings
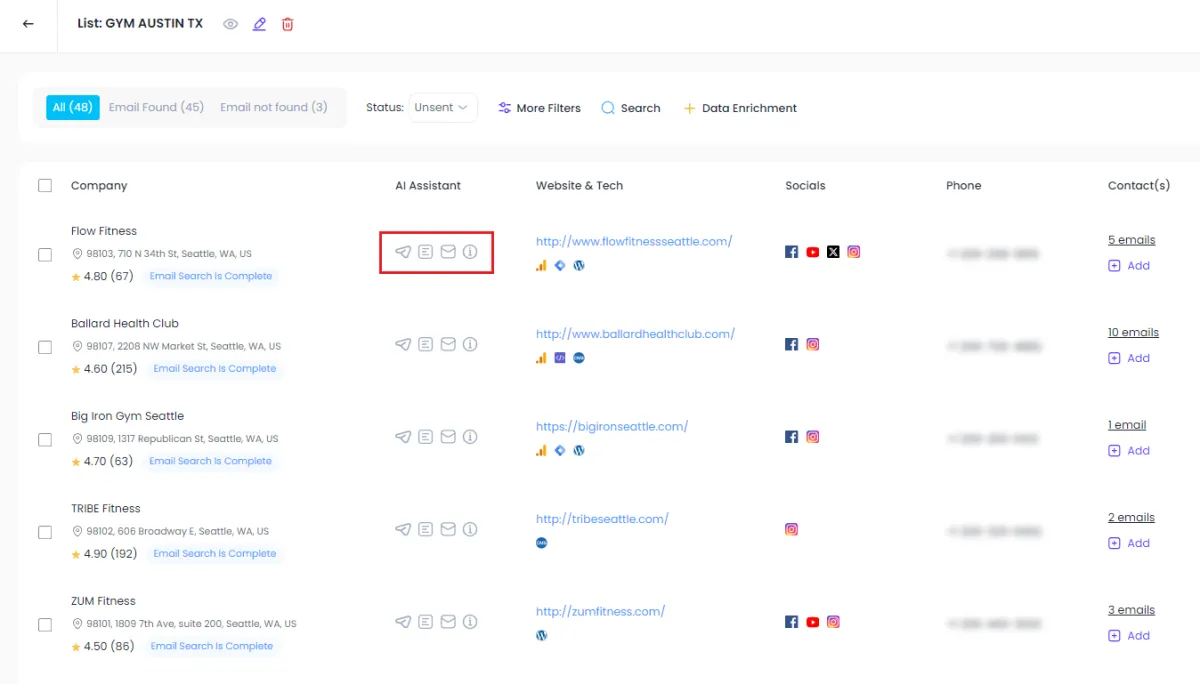
Open Your List: Begin by opening the List of prospects that you’ve searched for in the system.
Identify AI Features: In the list, you will see four buttons:
DM [Direct Message]
Summary
Subject Line
Introduction
These are the areas where the AI Assistant will generate content based on your prompts.
Step 2: Create a New AI Assistant Prompt [Optional]
The AI Assistant comes equipped with default prompts that are set to work with your new List. This step is optional.
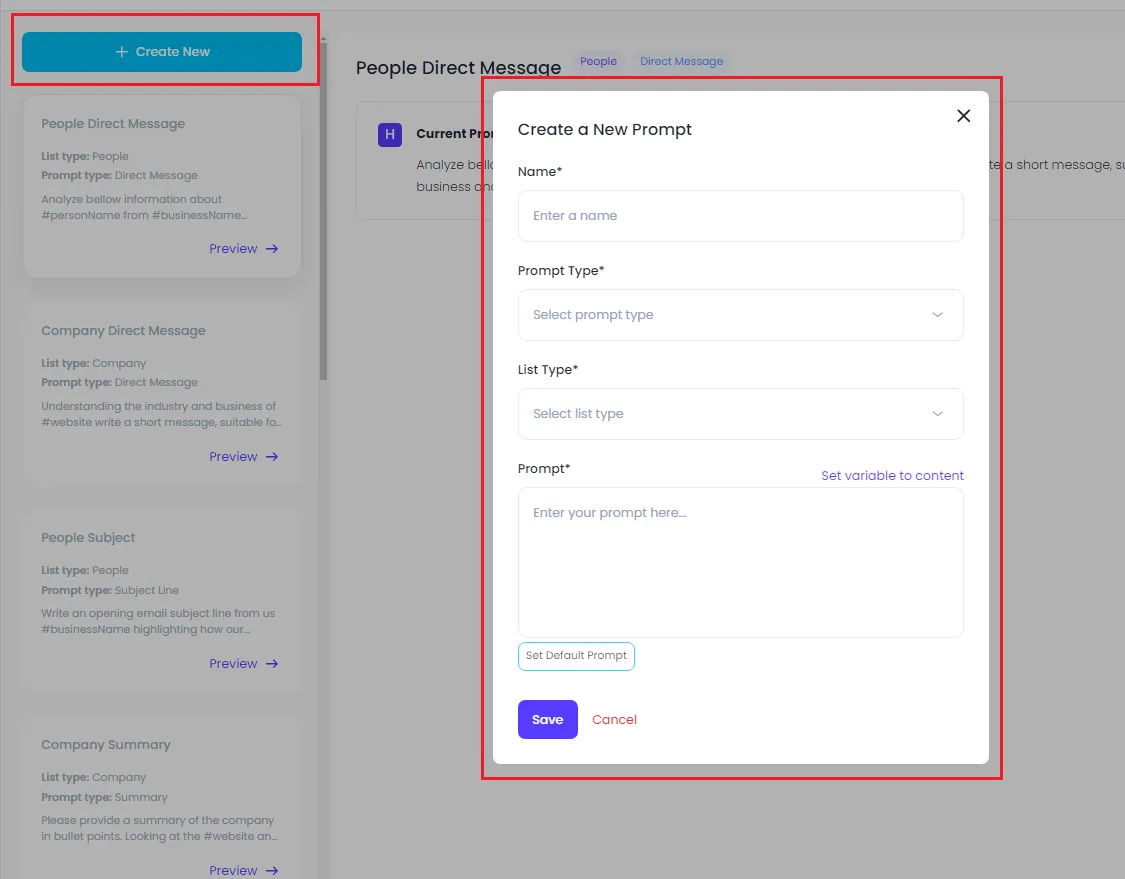
Click on "Create New Prompt": This will start the process of configuring a new prompt.
Name Your Prompt: Give the prompt a clear, recognizable name, e.g., Business Opening Prompt.
Select Prompt Type: Choose the type of AI prompt you want to create:
Direct Message: For creating social media DMs.
Summary: For summarizing company data.
Subject Line: For generating subject lines for emails or messages.
Introduction: For drafting personalized introductory messages.
Choose Data Sources: Select which variables (e.g., company name, website) the AI Assistant will use. For example:
Insert the company website and name from the search data.
Step 3: Write The AI Assistant Prompt
Define the AI Action: Write instructions for the AI to follow. Example:
"Analyze the business found at [company website] and determine if there are opportunities for [your company] to collaborate. Reply with suggestions on how both companies could benefit from working together."
Additional Parameters: Set any additional rules for the prompt. For example:
Format the reply into paragraphs.
Limit the response to five sentences.
Step 4: Test the Prompt
Save and Run the Prompt: After configuring the prompt, click Save. Select a company from your list, then run the prompt to see the AI’s output.
Review the Response: Analyze the generated result to ensure the output meets your expectations.
Example Result: "This company focuses on X and Y. Our company, [your company name], specializes in Z. We could collaborate on A and B."
Step 5: Fine-Tune the Prompt
Edit the Prompt: If the results need adjustment, edit the prompt. For example, you can change the tone by adding a word such as "humorous" to the instructions.
Test Again: Run the edited prompt and check how the new tone or format affects the output.
Example: After adding "humorous," the response may become more casual, e.g., "This company knows how to build the heck out of things."
Step 6: Automate Communication
Use the AI Assistant for Different Contexts: Set up prompts for various scenarios:
Direct Messages (DMs): Create a prompt specifically for generating polite and professional DMs, tailored to platforms like Instagram.
CRM Integration: Once you’re satisfied with the prompt results, they can be automatically populated into your CRM system.
Step 7: Advanced Techniques
Modify Default Prompts: Edit any of the pre-existing default prompts if you feel they need adjustments.
Change wording, tone, or style to suit your needs.
Use AI to Write Prompts:
You can ask ChatGPT to generate prompts for you. Example:
"Act as a prompt expert. Write a prompt that will generate an Instagram DM for a company."
Copy the generated prompt back into the system.
Step 8: Bulk Generate AI Assistant Content
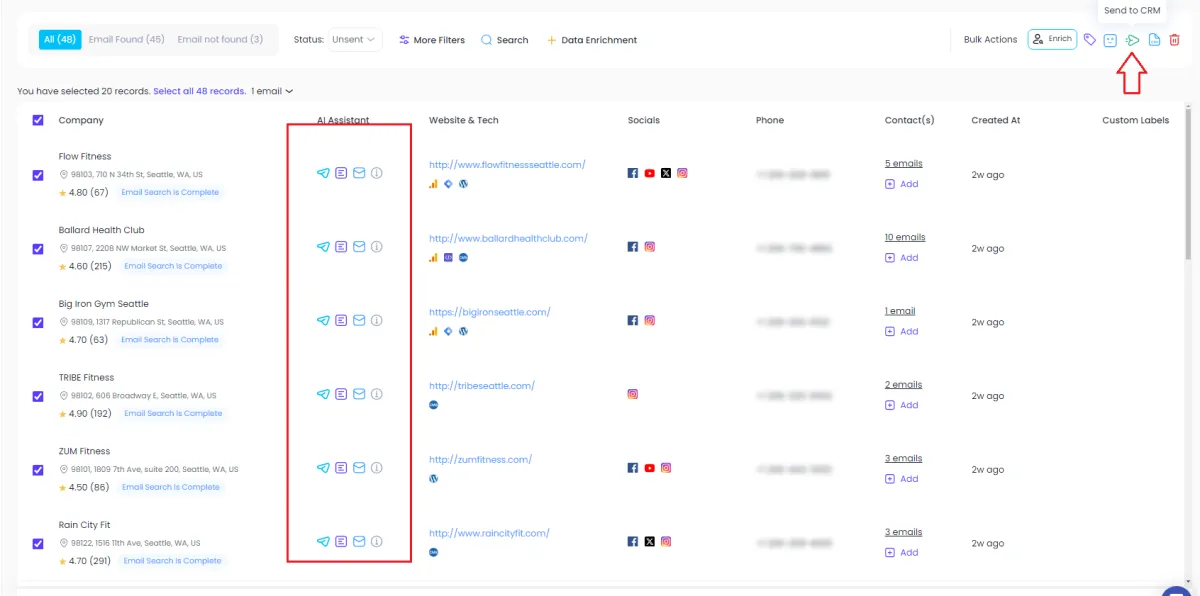
Bulk Selection: If you want to generate AI responses for multiple companies at once, select all companies in the list.
Run Bulk Actions: Click the AI Generate button to run the prompt across multiple companies simultaneously.
Step 9: Automate in CRM
Export to CRM: Once the AI Assistant has generated the content, it can be automatically sent to your CRM, populating fields like the subject line, introduction, and summary.
Use in Automation: AI-generated content can be used in automated emails, direct messages, or other communication workflows.
Tips: