
Onboarding Completion
Learn about how to set up webhooks here, !
Custom Webhooks
This tutorial teaches you how to set up Custom Webhooks. This step is only required if you're not using one of our native integrations and must send data to a different platform.
How To Set Up Your Webhooks
Objective
This is a step-by-step guide to set up webhooks for sending and receiving data between your platform and external applications using Zapier.
Step 1: Access the Webhooks Section
Navigate to the Settings section of your Dashboard and locate Custom Webhooks.
Step 2: Create a New Zap in Zapier
Open your Zapier account and create a new zap by selecting the Create Zap option.
Choose the Webhooks by Zapier trigger, and select the event Catch Hook to generate a unique webhook URL. Copy this URL for later use.
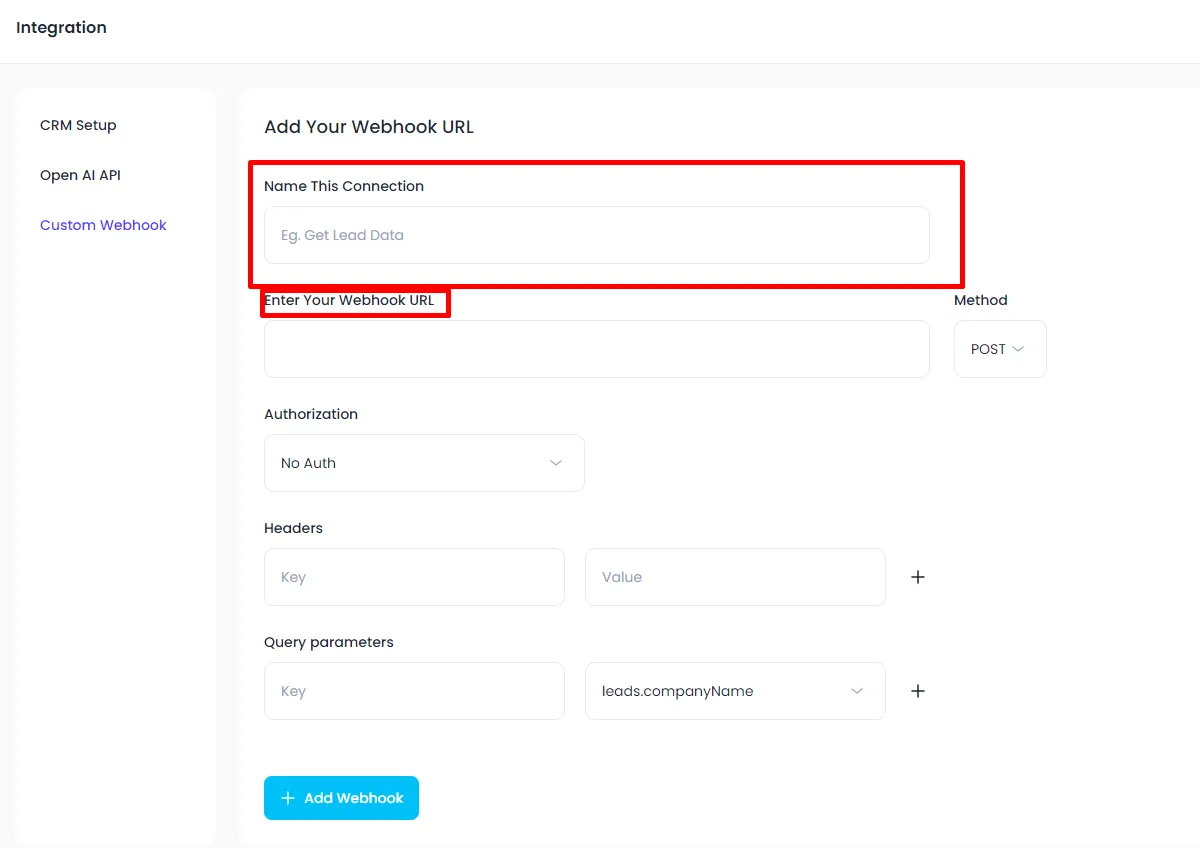
Step 3: Set Up Custom Webhook in Prospect Builder
Return to your platform and navigate to Integrations in your business settings.
Name a new Custom Webhook (e.g., "Zapier to HubSpot").
Paste the copied webhook URL into the designated field.
Step 4: Configure Data to Send
Specify the data you want to send to Zapier, such as:
Name
Phone number
Company name
Email address
Ensure you correctly map the fields from Prospect Builder to the corresponding fields in Zapier.
Step 5: Test the Integration
Click the Test button in Prospect Builderto send the data to Zapier.
In Zapier, confirm that the data is received correctly and displayed in the test results.
Step 6: Set Up Action in Zapier
Choose the action application (e.g., HubSpot) in Zapier.
Select the action event, such as Create Contact, and match the fields from the incoming data to the corresponding fields in the action application.
Step 7: Export Data to Zapier
To send data from Prospect Builder, select the records you want to export.
Click the Export button and choose the option to send to Zapier. This will trigger the Custom Webhook and send the selected records to your configured Zap.